

Make a blog with Jekyll : Markdown, Github, Latex
I write the 1st post of this blog to simply talk about how to create a blog like this. The main reason that made me use Jekyll to create a blog is the ability to easily write $\LaTeX$ equations. Indeed, I had previously tried with WordPress but none of the solutions that I had tested really convinced me. While doing some research on the subject, I came across Jekyll which seems to be used by a good number of scientific and computer bloggers. Jekyll is a static site generator, meaning that the web pages created do not change depending on the user who visits them: everyone sees the same content. Unlike a dynamic site which generates its content according to the characteristics of the request (time, IP address, user account, form, etc.). In addition, Jekyll allows you to edit text in Markdown based on the Kramdown library which automatically converts Markdown text into HTML. Jekyll is therefore a very suitable solution for writing a scientific web blog, but be aware that it is not the only solution on the subject since Hugo is also a popular Framework similar to Jekyll.
Setup
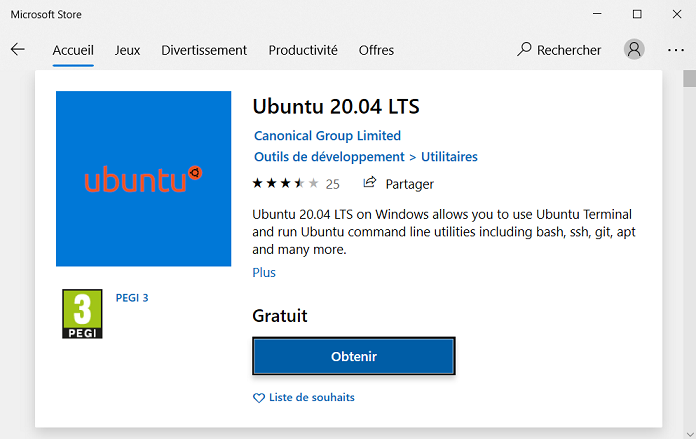
To use Jekyll on Windows, one way is to go through the Windows Subsystem for Linux which allows you to take advantage of a Linux environment. To do this, you can simply download the WSL app through the Microsoft Store.
Then, you have to install Ruby which is the programming language used by Jekyll to work. By opening the previously downloaded Ubuntu application and entering the following commands one after the other in the console, Ruby should be present on your computer:
sudo apt-get update -y && sudo apt-get upgrade -y
sudo apt-add-repository ppa:brightbox/ruby-ng
sudo apt-get update
sudo apt-get install ruby2.5 ruby2.5-dev build-essential dh-autoreconf
Note: For those who don’t want to go through the Linux subsystem, you can simply download the Ruby installer here: https://rubyinstaller.org/downloads/. You can then run the following Jekyll commands in a Windows Command Prompt window.
Finally, update the gem command and install Jekyll:
gem update
gem install jekyll bundler
Deployment
You now have all the minimum prerequisites to create a blog with Jekyll. Start by creating a directory where your blog files will be stored, create your blog with Jekyll then build the site and make it available on a local server:
mkdir my_blog
jekyll new mon_blog
cd my_blog
bundle exec jekyll serve
To browse your site locally, go to the address http://localhost:4000.
Tip: Use the --livereload option to automatically refresh the page whenever you make changes to the source files: bundle exec jekyll serve --livereload
You have now generated a static site with Jekyll: Congratulations, you can be proud of yourself! But I guess that’s not enough for you, you also want to make it available to everyone. One way is to host it on Github. Indeed, Jekyll was developed by the founder of Github and the deployment of a site is possible using the tool Github-Pages. Just create a git directory with the name <username_github>.github.io, generate your Jekyll site in this directory and push this directory to Github. Your blog <username_github>.github.io will now be visible from any web explorer.
Warning: Your git directory must be publicly visible. For more information on setting up with Github, visit this site
Use
Now that you’ve generated your site, Jekyll should have automatically created subdirectories and files in your main directory. It is by modifying these files that you will be able to configure and personalize your site. Below, some details on the function of some of these directories and files:
| FILE/DIRECTORY | DESCRIPTION |
|---|---|
| _config.yml | Stores configuration data. Modify here the name of the site, the information of the authors, the plugins, the extensions… |
| _includes | External files that add functionality and be used by Template files. |
| _layouts | Display templates that wrap blog posts. You can choose different layouts for each post. |
| _posts | The content of your blog, i.e. the posts you will write. Their names must follow the format: YEAR-MONTH-DAY-title.MARKUP |
| _data | External data that is automatically loaded and used by your site should be stored here. |
By default, Jekyll generates the site with the minima theme which allows for a simple and uncluttered version, but there are a large number of templates which allows you to customize the appearance of your site. For my part, I chose to use minimal-mistakes which is quite simple while offering a large number of possibilities.
Example: Minimal Mistakes provides a starter that allows you to quickly and automatically upload files to your account Github and have a site hosted by Github Pages.
One feature I was particularly interested in for my blog is being able to easily add equations. The best known language for writing mathematics is Latex which is generally used with its compiler to generate pdfs. For the web, the popular MathJax library written in Javascript is able to display Latex equations on most common web browsers. However, I preferred to choose the Katex library which has the advantage of being faster to load than MathJax when there are a lot of equations to convert (see example below, Katex on the left and MathJax to the right).

To install Katex on your blog, you must copy/paste the following lines in the head.html file, they allow you to load the Katex library on your site:
<link rel="stylesheet" href="https://cdn.jsdelivr.net/npm/katex@0.13.13/dist/katex.min.css" integrity="sha384-RZU/ijkSsFbcmivfdRBQDtwuwVqK7GMOw6IMvKyeWL2K5UAlyp6WonmB8m7Jd0Hn" crossorigin="anonymous" >
<script defer src="https://cdn.jsdeliver.net/npm/katex@0.13.13/dist/katex.min.js" integrity="sha384-pK1WpvzWVBQiP0/GjnvRxV4mOb0oxFuyRxJlk6vVw146n3egcN5C925NCP7a7BY8" crossorigin="anonymous"></script >
<script defer src="https://cdn.jsdelivr.net/npm/katex@0.13.13/dist/contrib/auto-render.min.js" integrity="sha384-vZTG03m+2yp6N6BNi5iM4rW4oIwk5DfcNdFxkk9ZWpDriOkXX8voJBFrAO7MpVl" crossorigin="anonymous" onload="renderMathInElement(document.body);"></script>
Well, that’s all for me. There are surely details to add and additional explanation to give, you can find more information in the sites below and you can also ask me questions in the comment section.
Laisser un commentaire